Windows and Doors this week over at Spoonflower. There were a lot I liked this week! The next two weeks are tractors and carousels. I think I'll be spending a little time at my computer this week!
Thursday, August 19, 2010
Tuesday, August 17, 2010
Drain Pipe Planters
I want to share some of my favorite projects from Sarah's garden individually. That last post was a lot to take in all at once, and there were some really fun projects that got skimmed over.
On one of my trips to pick up broken concrete I also found five old concrete drain pipes. I thought they were very structural and cool, I knew just what I wanted to do with them. I think a few of my friends though I was a little off my rocker, but I had a vision ****ahhhhhhhhh*****
I'm not even sure who painted them, it was on the list of things to do, that just always got done while I was away running errands. (Did I mention how awesome these woman are?) I left a can of spray paint and came back to bright red cement cylinders. So cool.
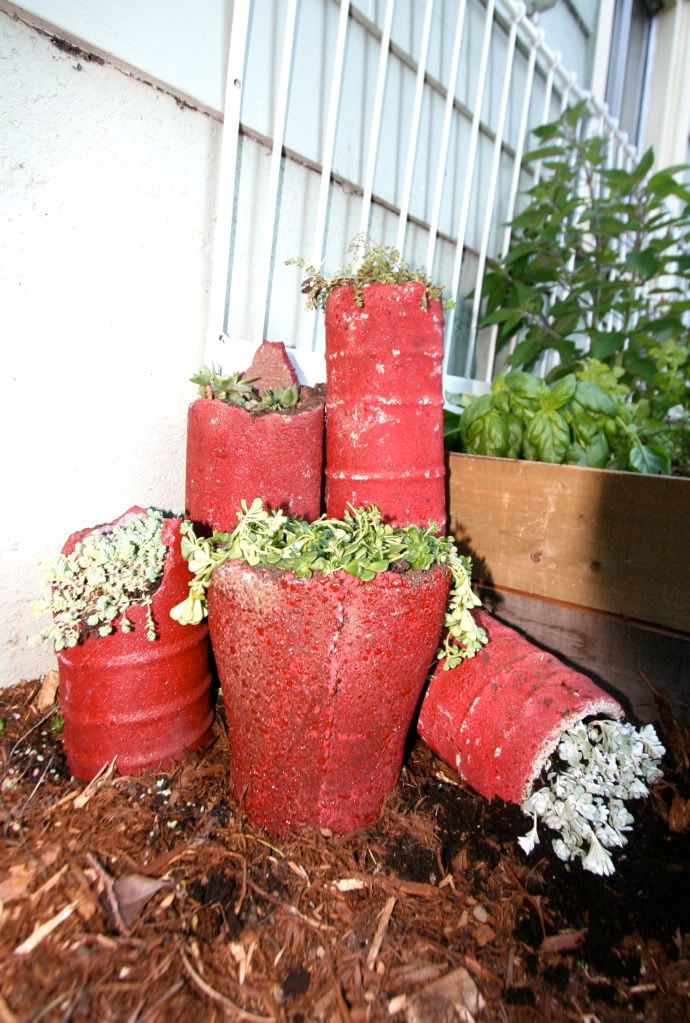
Sonya and I spent over a hour moving them around the garden and arranging and re-arranging them before we found the perfect spot and the perfect tableau.
Then they were filled with rocks, a bit of potting soil, and each was planted with a different sedum or succulent, each of which came from a friend or neighbor's yard. Again, so cool. I'll be on the lookout for more pipes to do something like this in my own yard.
On one of my trips to pick up broken concrete I also found five old concrete drain pipes. I thought they were very structural and cool, I knew just what I wanted to do with them. I think a few of my friends though I was a little off my rocker, but I had a vision ****ahhhhhhhhh*****
I'm not even sure who painted them, it was on the list of things to do, that just always got done while I was away running errands. (Did I mention how awesome these woman are?) I left a can of spray paint and came back to bright red cement cylinders. So cool.

Sonya and I spent over a hour moving them around the garden and arranging and re-arranging them before we found the perfect spot and the perfect tableau.
Then they were filled with rocks, a bit of potting soil, and each was planted with a different sedum or succulent, each of which came from a friend or neighbor's yard. Again, so cool. I'll be on the lookout for more pipes to do something like this in my own yard.
Monday, August 16, 2010
Sarah's Stone Soup Garden

One of my best friends turned 30 this week. She had decided to flee the country for this momentous birthday, depriving me of the opportunity to throw her a big party. She only made one mistake. She gave me the key to her house. . . (insert slightly evil giggle here.)
Sarah is one of the most giving and generous people I know. She "is the gooey, sticky... stuff that holds" our group of friends together. (name that movie. . .) She often spends so much time doing things for other people that she is left with very little time to do anything for herself.
When Sarah and her husband Jon bought their house a few years ago, along with a slew of things to fix on the inside of the house, they also inherited what Sarah has called the "Northwest Living Encyclopedia of Noxious Weeds." Sarah has spent hours nursing the nearly dead rose garden in her front yard back to health. Her huge back yard, however, sat relatively unchanged, a giant intimidating jungle.
Until we (Tabitha, Kristin, Kristen, Sonya, Denise, Amanda, Melanie, Rachel, Elle, Meghan, myself, and our 17 children, all under the age of 5) showed up. . .
 |
| From SSS |
At the end of the day, Sarah's yard looked like this.
 |
| From SSS |
 |
| From SSS |
 |
| From SSS |
 | ||
| From SSS Never get in the way of a mama with a sawsall. . .
|
| or hedge trimmers. . . just some sound advise. We may or may not be releasing pent up agitation that accumulates during the child rearing process! |
 |
| From SSS |
The end of day three.
 |
| From SSS |
Yes, working with babies around may slow you down a little bit, but look what you get in return! Aren't they adorable?
 |
| From SSS |
And, when they are feeling up to it, the preschools were actually pretty helpful.
 |
| From SSS |
The end of day four.
 |
| From SSS |
By day five the yard was beginning to take shape.
 |
| From SSS |
And some of the kids were starting to fall apart.
 |
| From SSS |
By the end of day six the patio is complete, the raised beds are installed, and the potting bench is in place (if not yet secure.)
 |
| From SSS |
On day seven the lot of us earth loving North-westerners showed up with plants and more plants, all from our own well loved gardens. It amazed me that we easily filled up most of Sarah's garden.
 |
| From SSS |
The end of day seven with just some clean up and a few finishing touches before Sarah returns the next day.
 |
| From SSS |
THE FINAL REVEAL. . .
 |
| From SSS |
The fire pit is some kind of old metal planter or bowl. I got them off of Craitslist and even the man who had them didn't know what they were for sure. I painted this one with a high heat epoxy paint to make it safe to build a fire in. The bricks are from my neighbor's chimney he recently tore down. The little table was a roadside rescue by Kristin and I made the top out of left over materials.
 |
| From SSS |
 |
| From SSS |
 |
| From SSS |
The super cool glass jugs also came out of Sarah's basement, a relic of her beer brewing days. The pieces of metal that they are resting on are vintage gas stove burners from the ReStore, painted to match the color scheme.
The table, the beautiful, beautiful table, was another roadside rescue of Kristin's (the woman is amazing, I tell ya.) It was in sad shape, but the cedar had aged to the most beautiful color. We tightened up the rusted old bolts as best we could (which was pretty good, if I say so myself) and then sanded and sanded and sanded and sanded the top. I applied tung oil to the top after that to protect it and bring out it's color and detail. The legs were painted to match the chairs and then distressed to match the age and style of the table. The bench was given the same treatment.
Tabitha came up with the "Stone Soup Garden" and it just fit so perfectly. We created this "birthday card" to hang in the garden, each of us signed the back of it.
 |
| From SSS |
There are five raised beds. They were made from the same reclaimed cedar fence. The trellis is the frame to an old daybed that had lost its hardware long ago. The photos in this picture are of each of our kids holding letters that together read "Happy Birthday Auntie Sarah."
 |
| From SSS |
One of my favorite parts are the old painted storm pipes planted with succulents.
 |
| From SSS |
These very cool wreaths were also discovered hiding in Sarah's basement. The frames came from Kristin's house. We spray painted them and they add just a perfect little pop of color to the wreaths.
 |
| From SSS |
These windows were pulled out of a house in North Seattle that is currently under renovation. I saw the post on craigslist about 9:00pm one night. I knew where the house was because I had also picked up some broken concrete a few weeks earlier from the same house. I knew they would be gone in the morning so I pulled myself off of my couch and drove over there right then to pick them up. The bunches of herbs hanging from each window came from Meghan's yard.
 |
| From SSS |
The patio was made using "urbanite" or broken up concrete. We stained the concrete to give it more of a stone like look. After filling in the spaces between with gravel and sand we put a layer of dirt on top of everything, and planted steppable ground covers. As our lovely Seattle rain works its magic the pavers will emerge and the ground covers will fill in to create a beautiful natural looking patio.
 |
| From SSS |
Yes, Sarah, your friends are crazy, but in a good way! We love you to pieces. Happy Birthday, dear friend.
 |
| From SSS |
 |
| From SSS |
For more photos of the entire process, visit my Picasa album, SSS.
 | |
| Sharing this project here. |
attempted organization of post:
FO
Thursday, August 05, 2010
Spoonflower Contest of the Week
Have you all been voting in the Spoonflower contest of the week?
This week the theme is "camouflage" Here is my entry. It is called Butterfly Battle.

And here are all of my votes for this week.

Go over to vote and while you are there look at all the adorable fabrics that are for sale. SO FUN!
This week the theme is "camouflage" Here is my entry. It is called Butterfly Battle.

And here are all of my votes for this week.

Go over to vote and while you are there look at all the adorable fabrics that are for sale. SO FUN!
attempted organization of post:
fabric,
spoonflower
Wednesday, August 04, 2010
Lost: The mind of one Duchess
That is for sure what the Duke and my neighbors thought when I showed up with these chair I picked up on the side of the road. (We live in a set of six townhouses that all share a driveway, and so my neighbors see what I am working on and chat, and generally shake their heads at the craziness I create.)
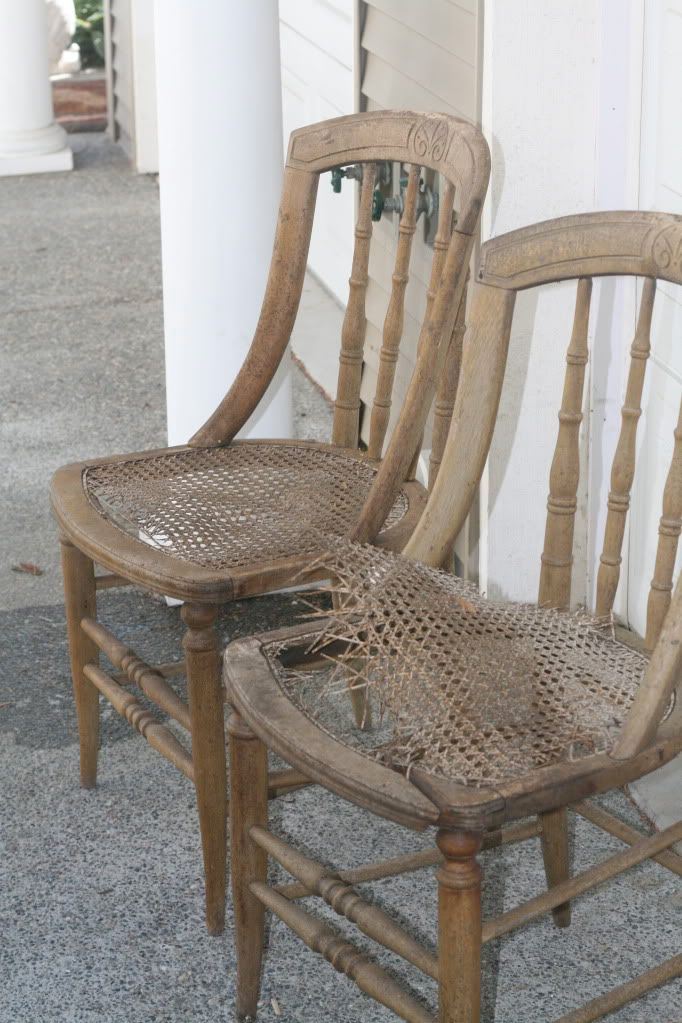
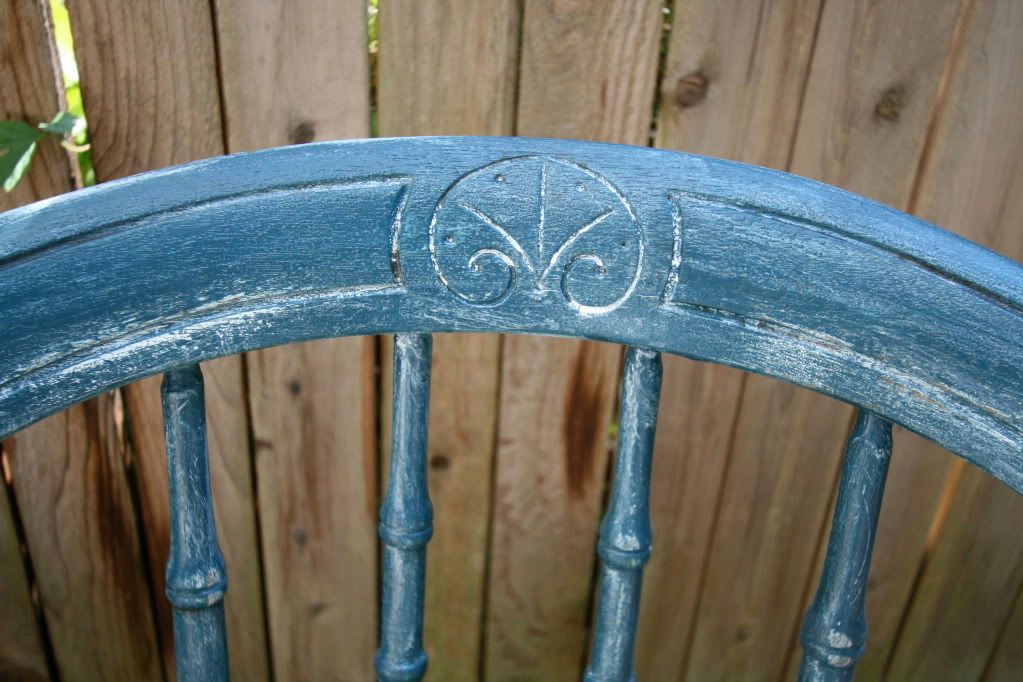
Yes, they were in bad shape, but I do love a challenge and look at this charming detail!
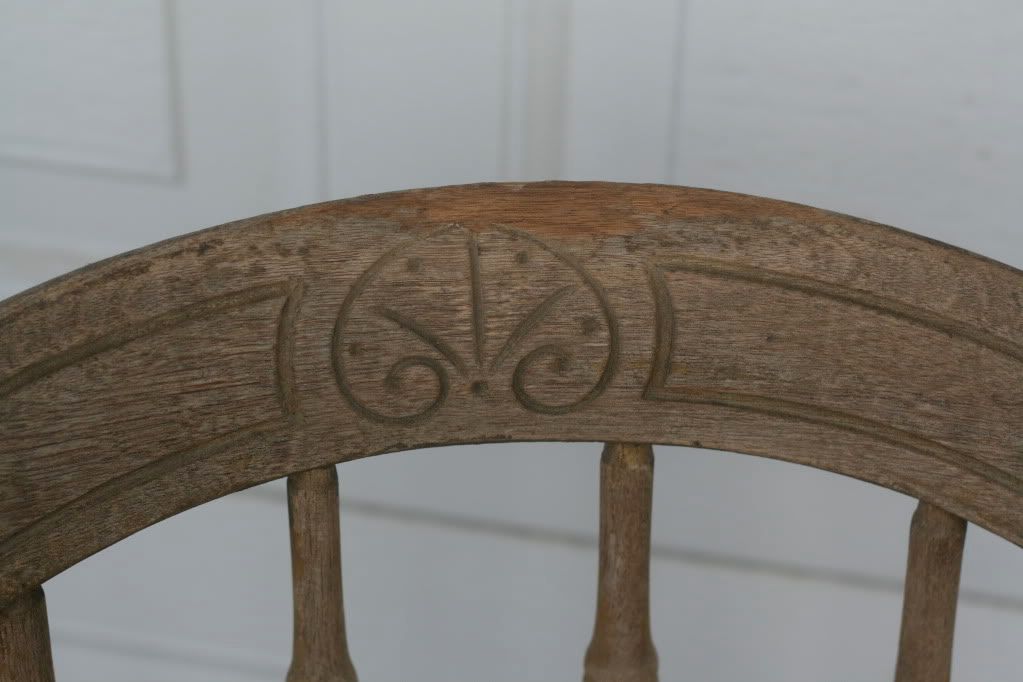
So, I tore the old wicker off of them, sanded them, and primed them.
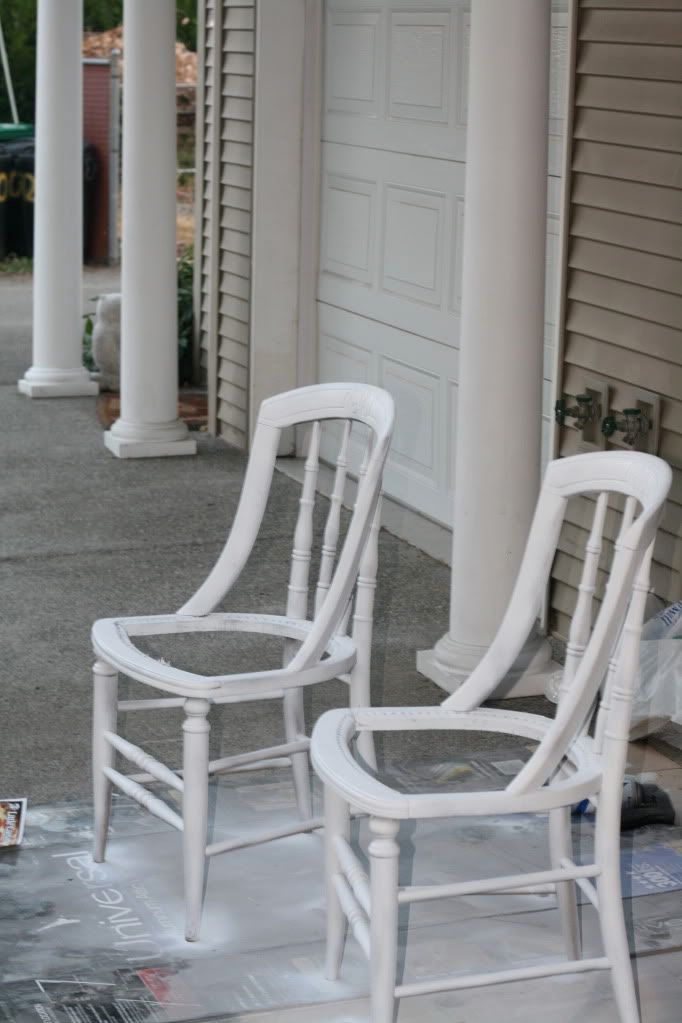
They drank up the paint like nothing else I have ever painted. I put three coat of primer on them. Then three more coats of a deep, cool teal, and we are ready for new seats.
I considered a few options, but eventually decided that a regular cushion would be the easiest route.
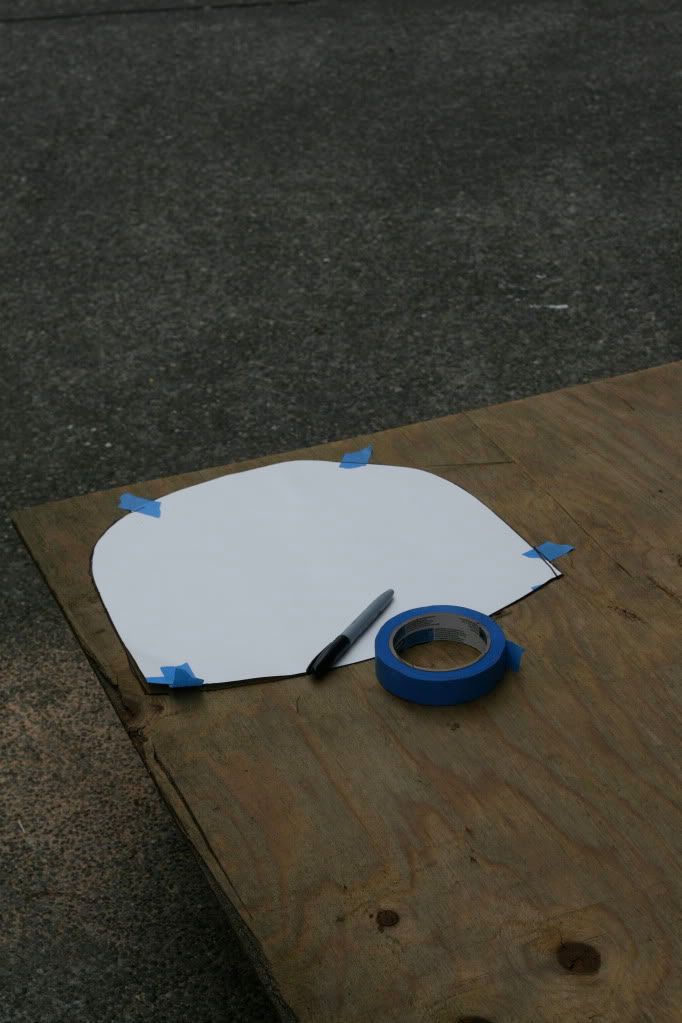
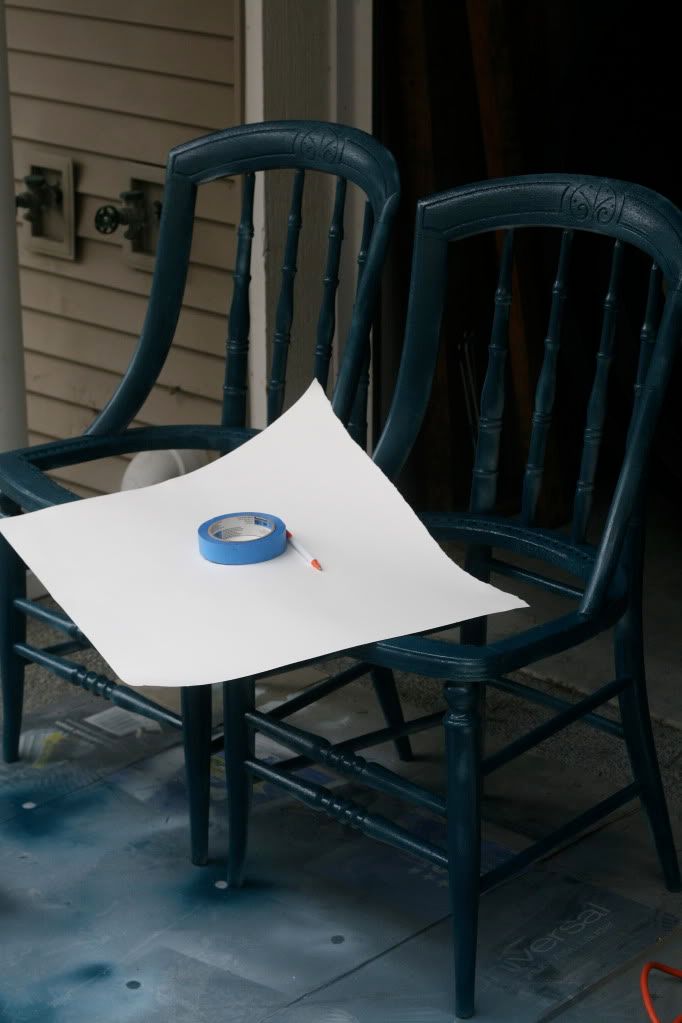
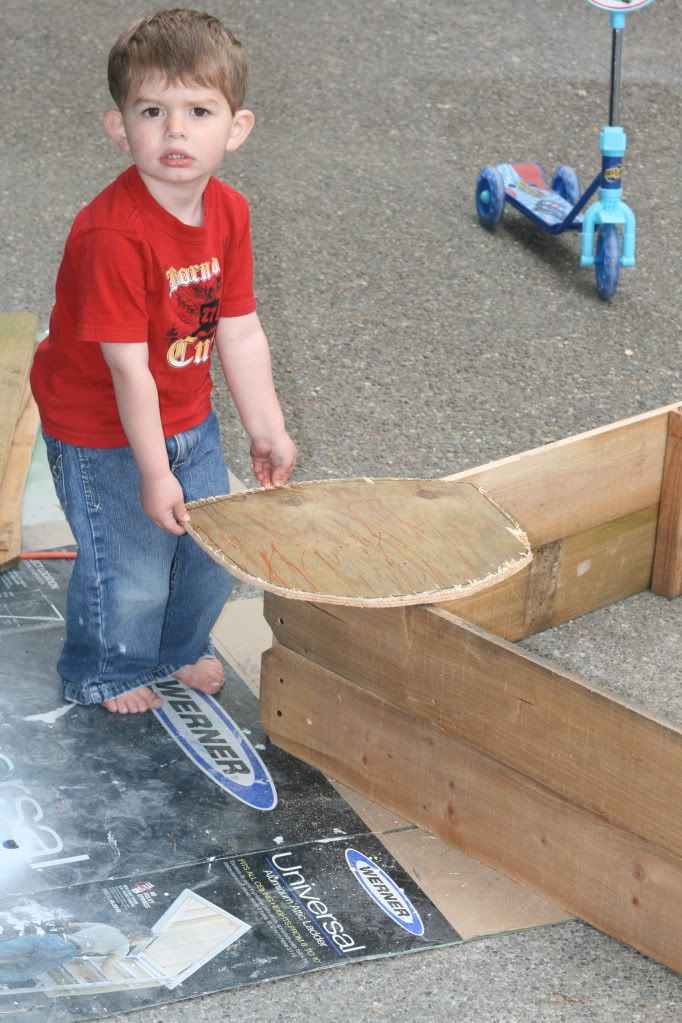
I taped a piece of poster board to the bottom of the chair and made myself a pattern in the shape of the hole in the chair. Letting your preschooler color on your plywood while you are getting out your jig saw is optional, but encouraged.
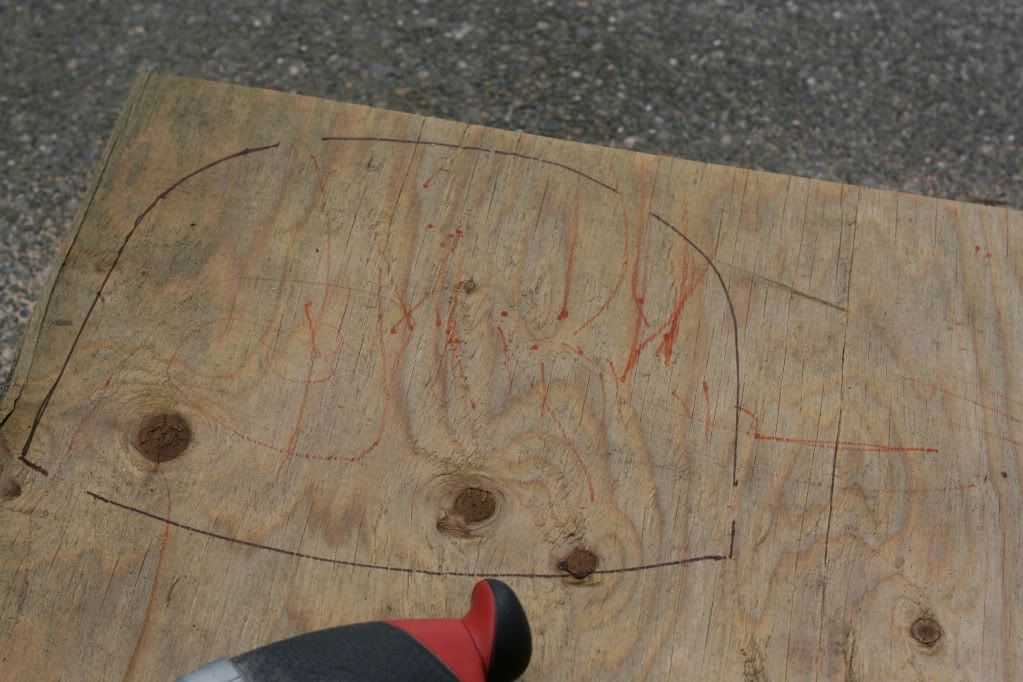

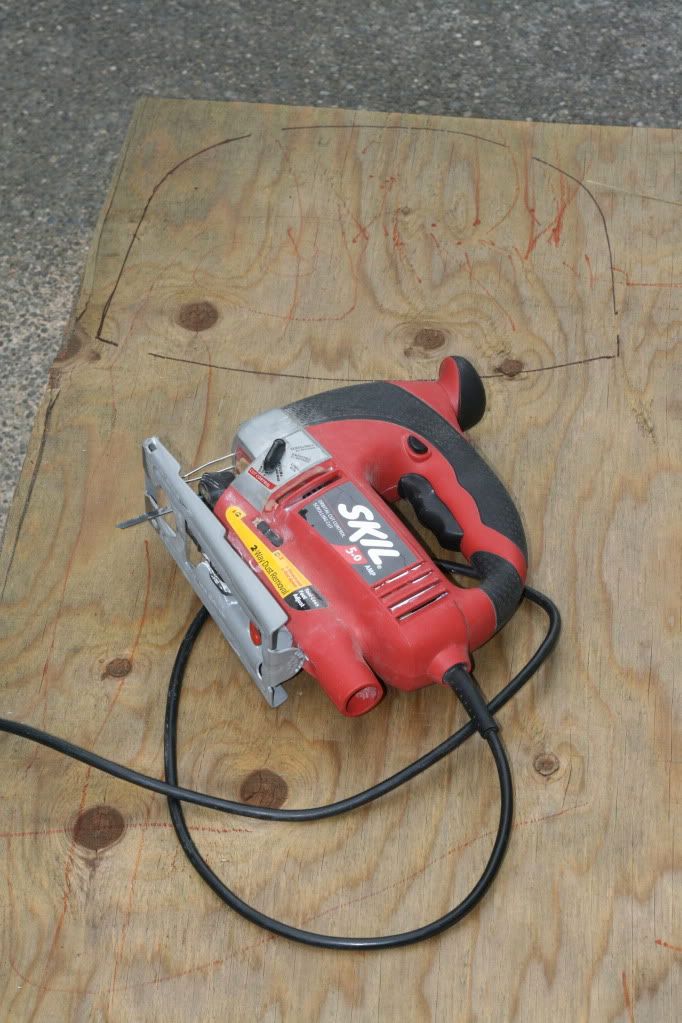
Then I banished said preschooler to "way over there!" and cut out the seat, about a 1/2 inch out from my pattern line. Little Sir was appropriately impressed that his Mama knows how to use a jig saw.
Next, using the same pattern, Sunbrella fabric (these chairs will be living outside) is cut out leaving a 1.5 inch allowance. I also cut some ripstop the same way to protect the batting a little better from the elements.
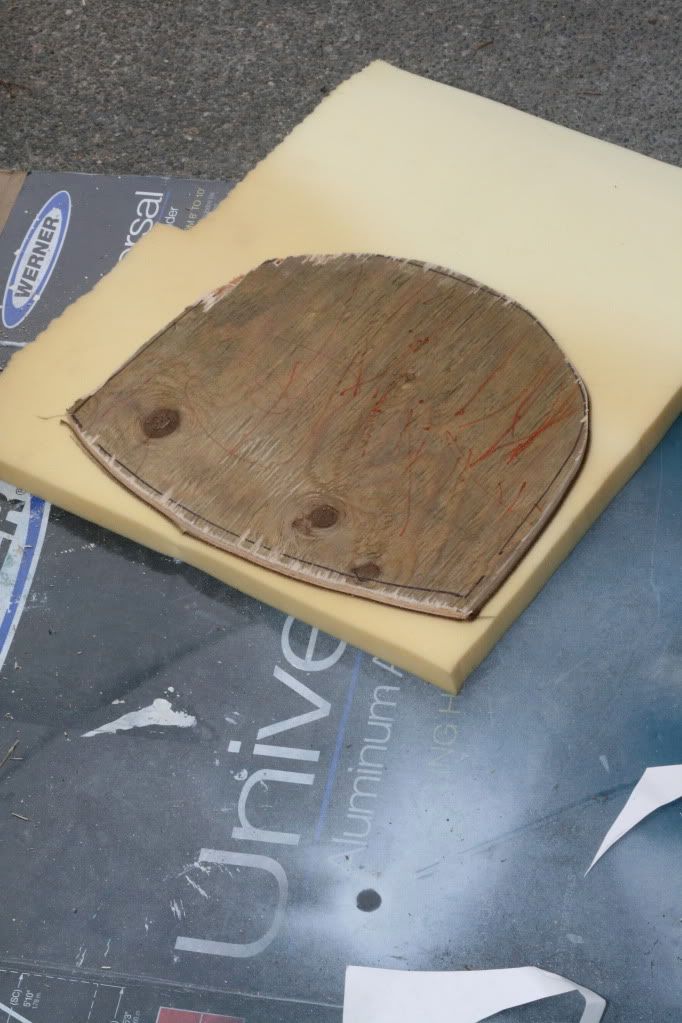
Don't use the paper pattern when cutting out your foam, use the actual piece of wood you will be using for the cushion w/ no extra allowance.
I was a little worried about using batting over the foam on a chair that was going to go outside, so I actually stapled the fabric down directly over the foam. It looked horrible and after pulling out some 8 billion staples I decided to add the rip stop to protect the batting and also try to remember to bring the cushions in when winter arrives.
Layer the foam, batting and fabric on top of your wood, then staple down the fabric, pulling it tight as you go, starting in the middle of each side and working toward each corner.
A little more paint, a little glaze, some "re-stressing" and one episode of Dr. Who later. . .
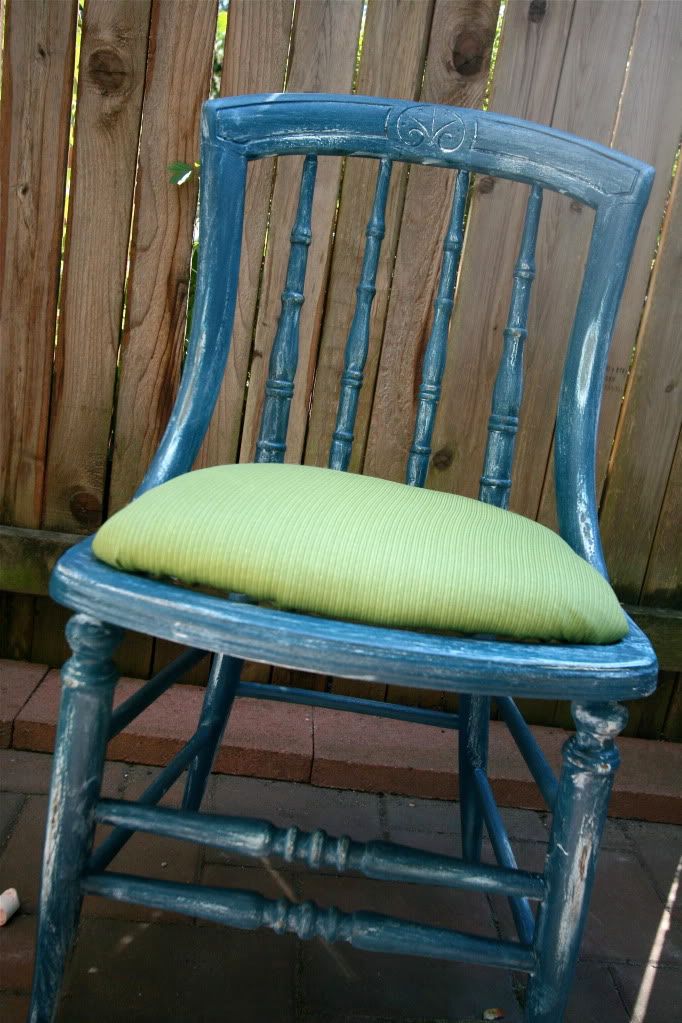
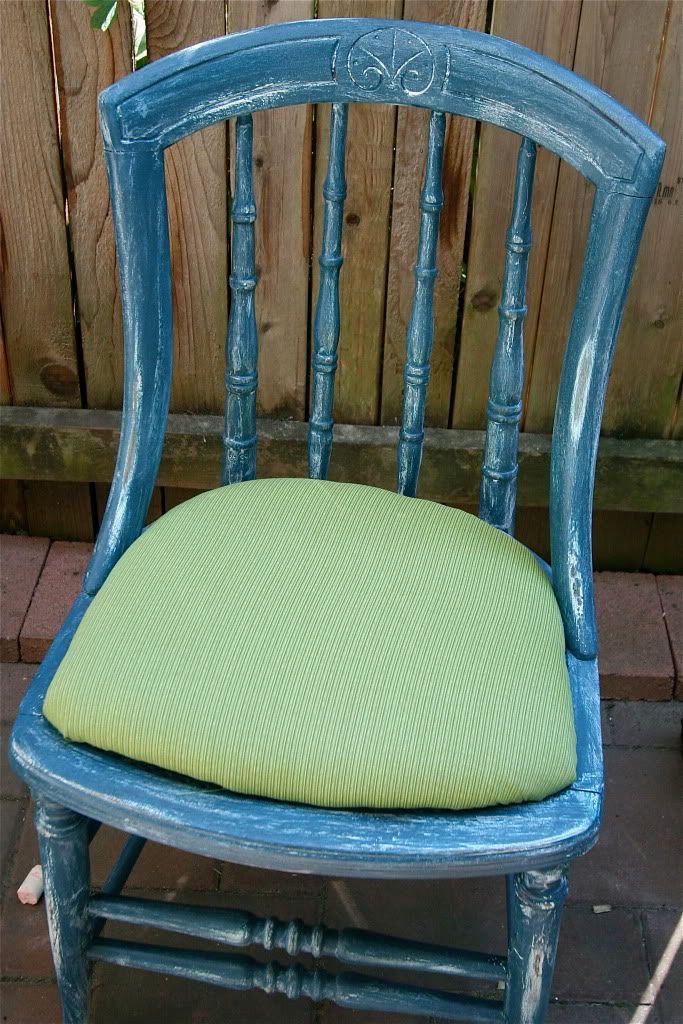
Oh yeah!!! Who's crazy now??? (OK, I still am, but it results in pretty things, so I'm OK with that!)


Yes, they were in bad shape, but I do love a challenge and look at this charming detail!

So, I tore the old wicker off of them, sanded them, and primed them.

They drank up the paint like nothing else I have ever painted. I put three coat of primer on them. Then three more coats of a deep, cool teal, and we are ready for new seats.

I considered a few options, but eventually decided that a regular cushion would be the easiest route.

I taped a piece of poster board to the bottom of the chair and made myself a pattern in the shape of the hole in the chair. Letting your preschooler color on your plywood while you are getting out your jig saw is optional, but encouraged.


Then I banished said preschooler to "way over there!" and cut out the seat, about a 1/2 inch out from my pattern line. Little Sir was appropriately impressed that his Mama knows how to use a jig saw.

Next, using the same pattern, Sunbrella fabric (these chairs will be living outside) is cut out leaving a 1.5 inch allowance. I also cut some ripstop the same way to protect the batting a little better from the elements.

Don't use the paper pattern when cutting out your foam, use the actual piece of wood you will be using for the cushion w/ no extra allowance.
I was a little worried about using batting over the foam on a chair that was going to go outside, so I actually stapled the fabric down directly over the foam. It looked horrible and after pulling out some 8 billion staples I decided to add the rip stop to protect the batting and also try to remember to bring the cushions in when winter arrives.
Layer the foam, batting and fabric on top of your wood, then staple down the fabric, pulling it tight as you go, starting in the middle of each side and working toward each corner.
A little more paint, a little glaze, some "re-stressing" and one episode of Dr. Who later. . .


Oh yeah!!! Who's crazy now??? (OK, I still am, but it results in pretty things, so I'm OK with that!)


Subscribe to:
Comments (Atom)


